Just getting started on a Mac and wondering which software to choose to structure your projects? This guide brings together a clear method, practical tips and video editing examples for common formats, so you can organize your media, edit faster and get a clean result from your very first attempts.
Editing Videos on a Mac: The Basics
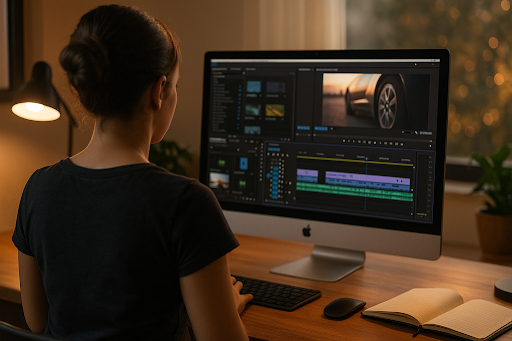
Video editing follows a clear sequence: import, organize, assemble, refine, then export. Mac users benefit from a stable macOS ecosystem that is well optimized for video and audio. To edit videos on a Mac, start by defining the result you want, choose a consistent video format and prepare your files. By laying out your clips on the timeline, you can create smooth videos, add transitions, balance the audio and export a version suited to each platform.
What Is the Best Video Editing Software for Mac?
Before you download a video editing program, define your level and your constraints, then compare ease of use, stability and export quality. On a Mac, several options cover everything from first experiments to regular production. Some tools focus on an easy-to-use interface, others on speed and advanced editing features.
Here are a few useful criteria to help you decide:
- Learning curve and built-in help
- Essential editing tools: trimming, transitions, titles, video tracks
- Audio handling and export to multiple formats
- Performance on Mac and integration with the Apple ecosystem
iMovie: Apple’s Free Video Editor for Beginners
iMovie is often the ideal entry point for editing on a Mac. This free Apple app offers a clear interface, themes and export to several formats. You can edit videos quickly, arrange the segments you want, adjust the audio and apply a few filters. For a basic video project, it is a simple video editor that still delivers a real editing experience.
Final Cut Pro: Apple’s Fast, Professional Editor
Final Cut Pro stands out for its speed on Mac and its magnetic timeline. Its editing features are comprehensive: multicam, video stabilization, colour grading, animated titles and well-organized sequence management. Mac users who produce video content regularly rely on its performance and reliability for professional editing and smooth 4K video.
Adobe Premiere Pro on Mac: The Cross-Platform Standard
Adobe Premiere Pro is a well-known video editing program that runs on both macOS and Windows. It works hand in hand with After Effects and Audition, for a solid video and audio workflow. It offers colour correction, effects, transitions and precise file management. Teams that work across different computers benefit from a versatile editor that ranks among the best editing programs.
To progress quickly and get your import, editing and export settings right on Mac, a video editing course focused on Premiere Pro gives you a clear method and shortens the learning curve.
OpenShot and Movavi: Budget-Friendly Options for Mac
OpenShot and Movavi are well suited to short clips and educational projects. They offer the essential editing tools, simple effects and an accessible interface. OpenShot is free and open source, while Movavi Video Editor is an affordable paid program with a free trial that makes it quick to assemble shots, add titles and export. Both are good ways to explore video editing on Mac without a major investment.
Essential Features of a Video Editor
To edit effectively on a Mac, focus on the fundamentals that serve your distribution goals. Good Mac video editing software should handle media, formats, audio and export while running smoothly on a MacBook. A clear interface, consistent shortcuts and real-time previews make editing easier without sacrificing quality.
Editing Tools: Cuts, Transitions and Titles
The heart of video editing is precise editing: frame-accurate cuts, subtle transitions, readable text and clear visual cues. Look for software that makes it easy to align cuts, organize video tracks and edit a video without altering the source file. The right editing app keeps your project organized and speeds up repetitive tasks.
Audio: Music, Voice and Clean-Up
Viewers will forgive average images, but not bad sound. Work on your audio: levels, noise reduction, equalization and the mix between audio and video. Voice presets, clean fades and light compression deliver a pleasant, professional video, even when the sound was recorded in less-than-ideal locations.
Free Stock Footage and Royalty-Free Music
To add energy to your projects, use clips from free stock video libraries and royalty-free music. Check the licences and match the video format and audio sample rate to avoid stuttering. Using B-roll in moderation supports your message without overloading the edit.
Online Video Editors vs Installed Software
An online video editor can help in a pinch for a quick clip or a social media template. For bigger projects, installed software on macOS remains the safer choice for stability, file privacy and performance as length and complexity increase. Another major advantage: built-in AI tools in Final Cut Pro (automatic reframing, object tracking, voice isolation) and Adobe Premiere Pro (Auto Reframe, scene edit detection and automatic captions) speed up organization, sharpen the pacing and make finishing more reliable.
Quick Tutorial: How to Edit a Video on Mac, Step by Step
Here is a straightforward method to stay on track and get consistent results. It works for a tutorial as well as a short story, with close attention to visual and audio consistency on your MacBook.
Import Your Files and Organize Your Clips
Create a project with the right video format settings and gather all your clips in a single folder to avoid broken links. Sort them into clear bins (scenes, B-roll, graphics, music) and use a consistent naming system to find things faster. Review your takes, mark the strongest moments and assemble a selects sequence. On the timeline, start with a rough cut without effects or fades, set the pace with the reference audio, then tighten the cuts down to the frame. Finish with a short test export to check sharpness, colour and sync before adding titles, filters and corrections.
How to Edit, Add Audio and Export
Use transitions sparingly, add readable titles and balance the audio. Correct the colour, even out the exposure and apply light video filters to avoid an artificial look. Export in several formats for each platform, then check playback on different devices. For more on the editing process itself, read our guide on how to edit a video in 10 steps, and test a few export settings before publishing.
Mac and MacBook Tips: Performance, Storage and File Formats
Keep your system up to date and use a fast drive. If you edit on the go, choose a MacBook with enough RAM and a calibrated display. Archive your projects, clean out unused files and keep free space available. Close unnecessary apps and work from a local drive for smooth, reliable editing, all the way to 4K delivery.
Trust Productions Arborescence With Your Video Editing
Based in Montreal and active in Quebec, across Canada, in the United States and in Europe, our team puts its expertise to work for a measurable impact on your communications. Our multidisciplinary team handles every step, from shooting to editing. We work in an advanced video studio designed for image and sound. Our custom webcasting solutions include live chat, Q&A, polls and real-time analytics.
Our strategic guidance informs every technical choice, from framing to export. Rigorous project management and ongoing performance tracking ensure consistency, reliability and on-time delivery. We deliver efficient shoots, precise motion graphics and tailored training to help your teams become more independent.
Entrust your next project to Productions Arborescence for a clear action plan, well-planned support and quality that showcases your brand. Contact us to get started.